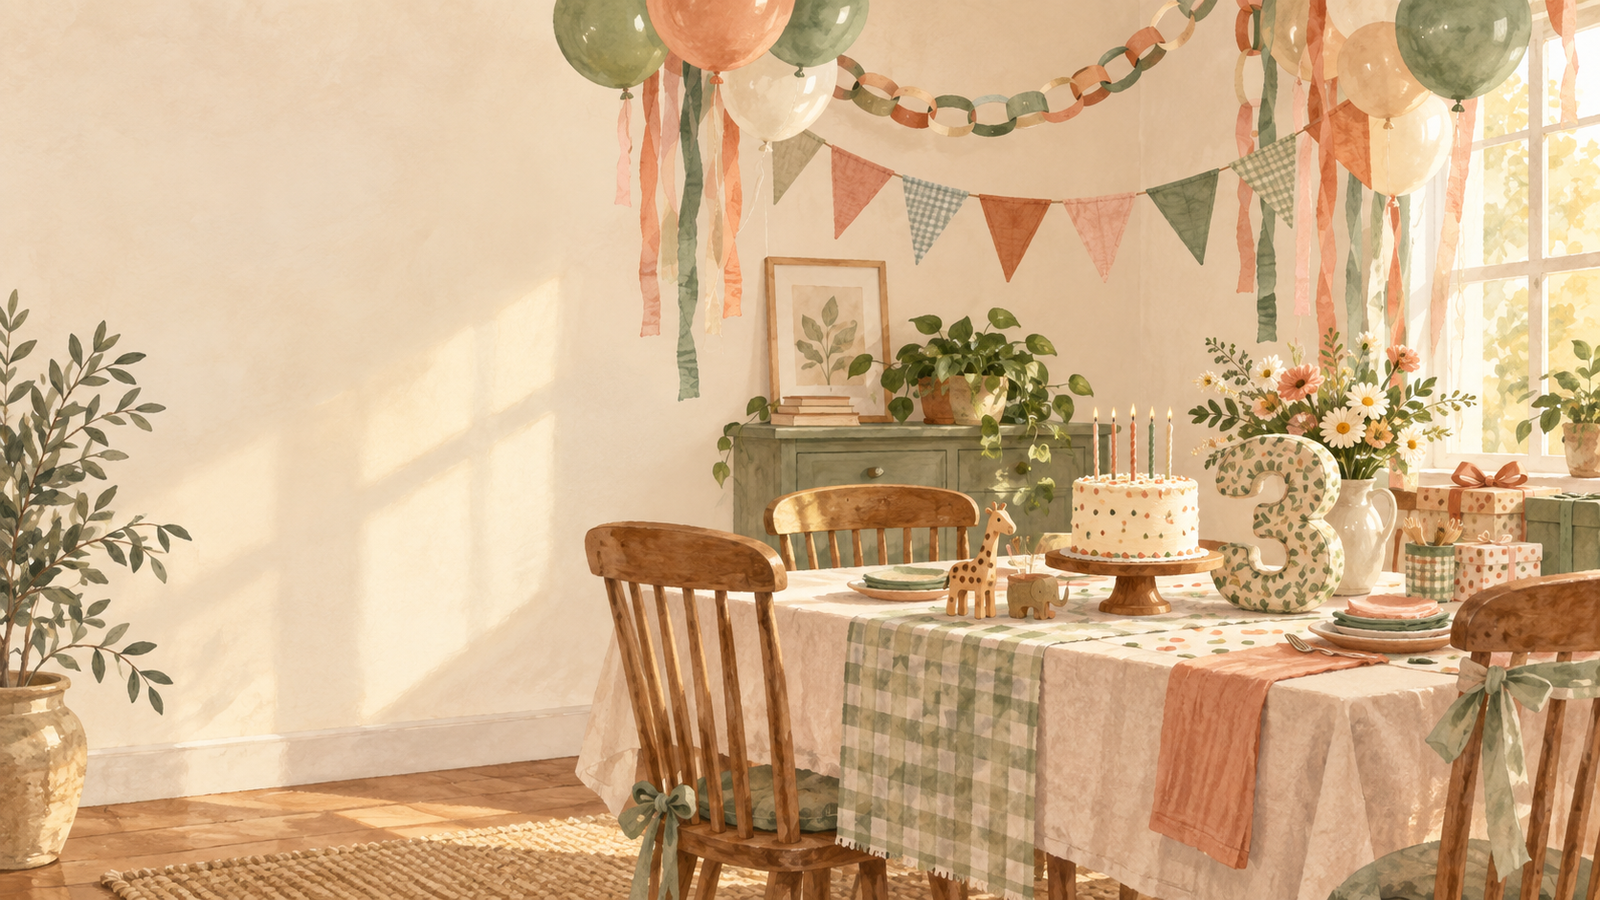
How to Create a Beautiful DIY Birthday Party at Home
A child’s birthday party does not need a rented backdrop, a balloon artist, or dozens of themed decorations to feel special.
Some of the loveliest parties are made from simple materials: paper, ribbon, fabric scraps, a few balloons, and a small color palette repeated with care. The difference is not how much you buy. It is choosing a few details that work together and giving them enough space to be noticed.
This guide creates one calm, joyful birthday setting using five DIY elements:
- A paper-chain backdrop
- A reusable fabric-covered birthday number
- Ceiling balloons with hanging streamers
- A handmade Happy Birthday bunting banner
- A simple, styled cake table
The result is festive enough for photographs, but still warm enough to feel like home.
Start With a Small Color Palette
Before cutting anything, choose three colors:
- One main color — sage green, soft blue, dusty pink, terracotta, or sunny yellow
- One lighter neutral — cream, white, oatmeal, or pale beige
- One small accent color — gold, warm orange, coral, or deep green
For example:
- Sage green + cream + muted peach
- Dusty blue + white + warm yellow
- Terracotta + oatmeal + olive green
- Soft pink + cream + cherry red
Use those colors in every project. This is the simplest way to make homemade decorations look intentional rather than random.
You do not need to use a character theme unless your child truly loves one. A color story, a favorite animal, flowers, stars, cars, or a simple “garden party” feeling is enough.
What You Will Need
Gather what you already have first. This project is meant to be flexible.
Basic supplies
- Colored paper, cardstock, or leftover wrapping paper
- Scissors
- Ruler and pencil
- Glue stick or craft glue
- Double-sided tape or removable adhesive strips
- Painter’s tape
- String, twine, ribbon, or yarn
- A hole punch, if you have one
- Curling ribbon or paper streamers
- Balloons
- Fabric scraps, an old pillowcase, fabric napkins, or inexpensive cotton fabric
- Cardboard from a shipping box or foam board
- A marker or paint pen for letters
Optional details
- Tissue paper
- Small paper flowers
- A few battery-operated fairy lights
- A simple tablecloth, sheet, or curtain panel to use as a backdrop
- A small basket, crate, or cake stand
Project One: Make a Paper-Chain Backdrop
Paper chains are inexpensive, easy to make with children, and surprisingly effective when they are grouped together rather than scattered around the room.
Instead of making one long chain across every wall, use them to frame one area: behind the cake table, around a doorway, or near the birthday breakfast table.
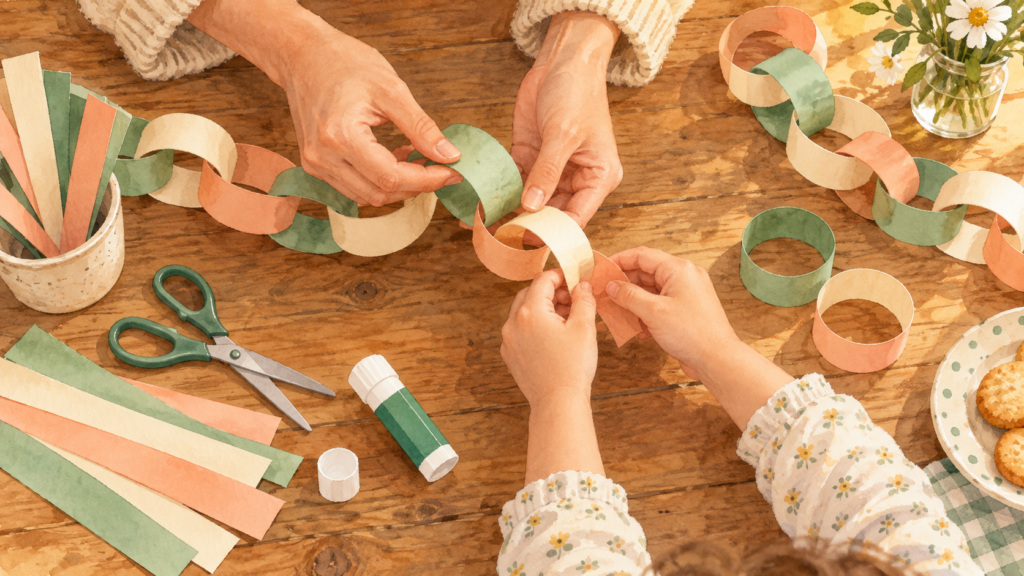
What you need
- Paper in your three chosen colors
- Scissors
- Ruler
- Glue stick, double-sided tape, or a stapler
Step-by-step
- Cut paper into strips about 1 inch wide and 6 to 8 inches long. They do not need to be perfect.
- Sort the strips into your color order. For example: cream, sage, peach, cream, sage, peach.
- Make the first loop and secure the ends with glue, tape, or one staple.
- Thread the next strip through the first loop, then fasten it into a circle.
- Continue until you have several chains of different lengths.
- Hang the chains vertically from a curtain rod, a removable wall hook, or a length of twine.
For a fuller backdrop, make five to eight vertical chains and keep the longest ones in the middle. Let the outer chains be shorter. This creates a gentle arch shape without needing a balloon arch.
If children are old enough to use scissors safely, they can help cut strips or choose the color order. Craft projects such as a simple paper bunting are commonly recommended for children around age six and up with adult supervision. Pritt’s paper-bunting guide offers a similar child-friendly paper project.
Project Two: Make a Fabric-Covered Birthday Number
A large birthday number creates an instant focal point for photographs. Rather than trying to wrap fabric around an inflated balloon—which can be frustrating and does not hold its shape well—make a lightweight cardboard number that gives the same visual impact and can be saved for later.
This is also a more reusable option for a birthday breakfast, a party table, or a yearly photograph.
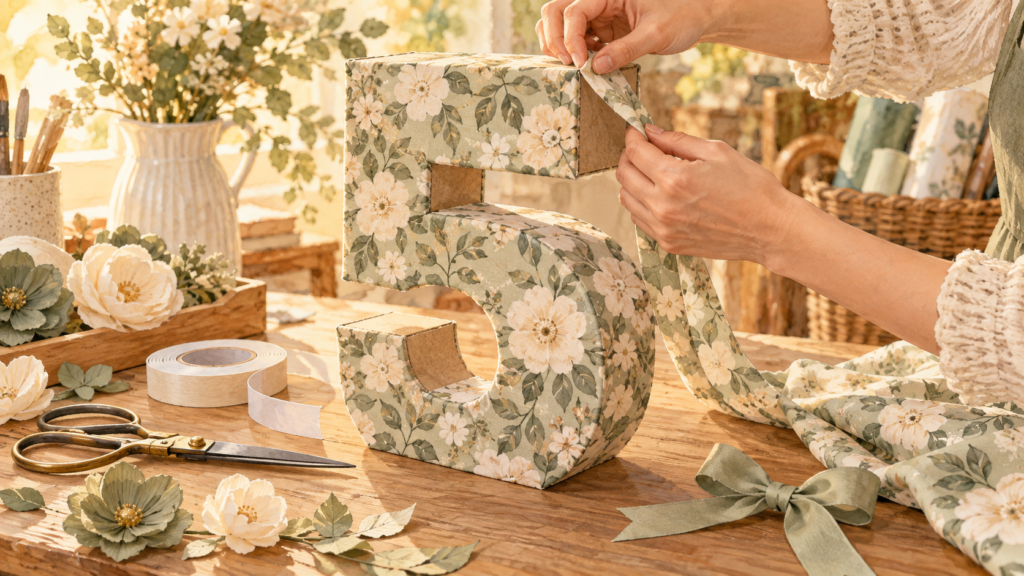
What you need
- Large cardboard or foam board
- Pencil
- Scissors or a craft knife for adults
- Fabric scraps or one piece of lightweight cotton fabric
- Glue stick or craft glue
- Double-sided tape
- Ribbon, paper flowers, or small fabric bows for decoration
Step-by-step
- Draw the birthday number in a large, simple shape on cardboard. A number about 18 to 24 inches tall is large enough to show in photographs.
- Cut it out. An adult should handle craft knives or thick cardboard.
- Place the number face down on the wrong side of your fabric.
- Cut the fabric roughly 2 inches larger than the cardboard number on every side.
- Snip small cuts into the fabric around curves and inside corners. This helps the fabric lie flat once it is folded around the edges.
- Apply glue to the front of the cardboard and smooth the fabric over it from the center outward.
- Turn the number over. Fold the extra fabric around the edges and secure it on the back with tape or glue.
- Add one small finishing detail: a ribbon bow, a few paper flowers, a painted edge, or the child’s first initial.
Keep it simple. A fully covered number in one beautiful fabric usually looks more polished than a number covered in many different decorations.
Place it on the cake table, against the paper-chain backdrop, or on a shelf near the birthday child’s favorite books and toys.
Project Three: Create Ceiling Balloons With Hanging Streamers
This is one of the easiest ways to make an ordinary room feel festive.
The secret is not filling every inch of the ceiling. Use a small cluster over the cake table, along one side of the room, or above the birthday breakfast area. The balloons should feel light and playful, not crowded.
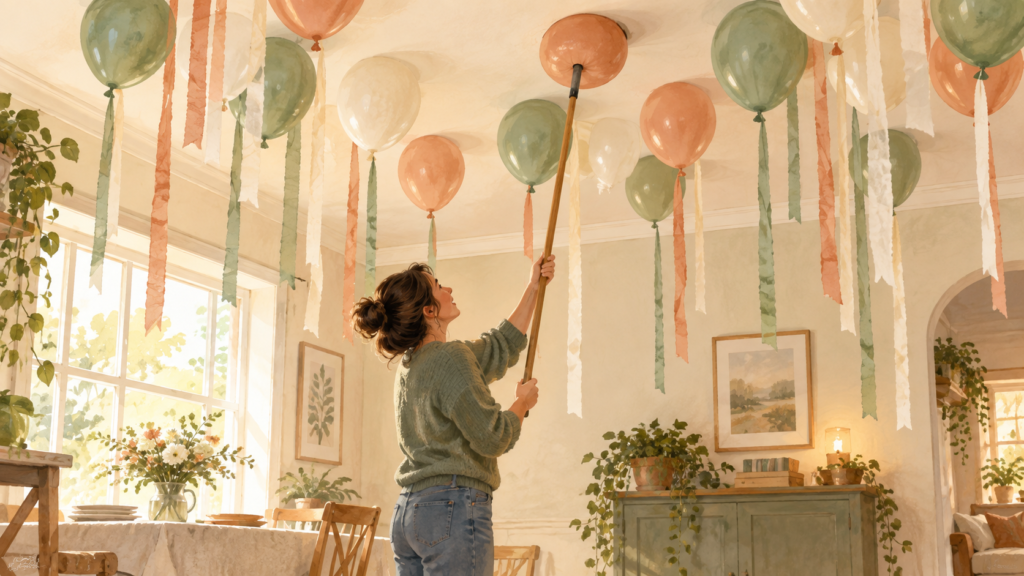
What you need
- Air-filled balloons in two or three coordinating colors
- Curling ribbon, crepe-paper streamers, or strips of tissue paper
- Removable adhesive dots or painter’s tape
- A broom handle or clean mop handle for high ceilings, if needed
Step-by-step
- Inflate the balloons with air, not helium. Vary the sizes slightly for a softer look.
- Cut streamers or curling ribbon into lengths of about 3 to 5 feet.
- Tie or tape two to four strands beneath each balloon.
- Attach a small removable adhesive dot to the top of each balloon.
- Test your adhesive in a hidden part of the ceiling first. Paint, texture, humidity, and ceiling finish all affect how well it holds.
- Gently press the balloon onto the ceiling. Use a broom handle to reach high places instead of climbing on furniture.
- Cluster balloons loosely rather than arranging them in a perfect grid.
For a more delicate look, use mostly cream or white balloons and add only a few in the accent color. For a bolder party, alternate the main color and accent color, with a few neutral balloons to give the eyes a rest.
Balloon safety matters
Balloons are decorations, not toys. The U.S. Consumer Product Safety Commission warns that uninflated balloons and pieces of broken balloons can be choking or suffocation hazards for young children. Keep uninflated balloons away from children, supervise balloon use, and immediately collect and discard any broken pieces. Read the CPSC balloon-safety guidance here.
Do not hang balloons directly over a baby’s play space, crib, high chair, food table, or an area where children will be climbing. Keep long ribbons and streamers out of reach of babies and toddlers.
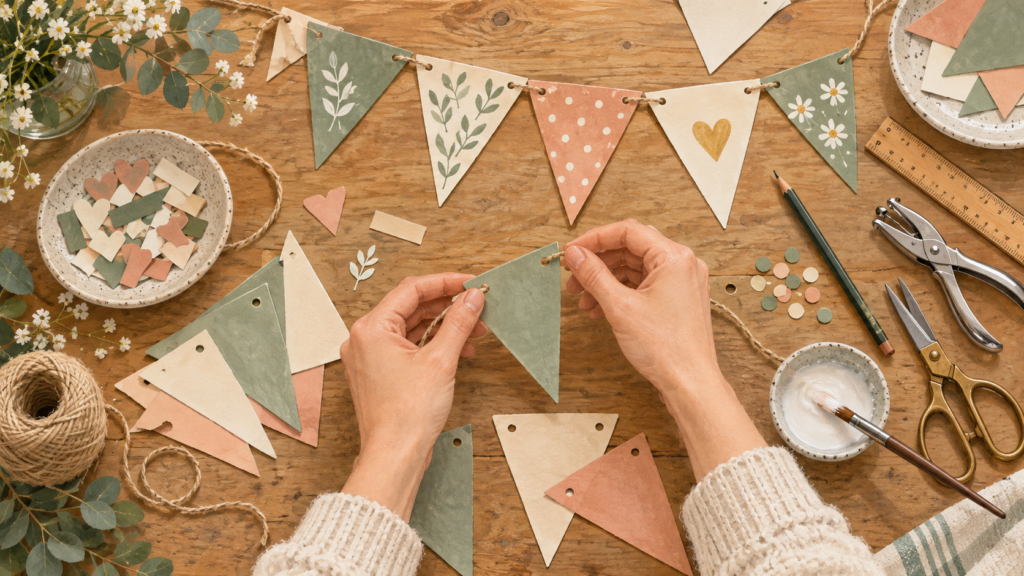
Project Four: Make a Handmade Happy Birthday Bunting Banner
A bunting banner gives the room a clear celebratory message and makes a lovely backdrop for photographs.
You can make it from cardstock, wrapping paper, brown paper bags, or fabric. Paper is the easiest version for a one-time party. Fabric is a beautiful reusable option.
What you need
- Cardstock or sturdy paper in your color palette
- Pencil and ruler
- Scissors
- String, twine, or ribbon
- Glue stick or double-sided tape
- Marker, paint pen, or printed letters
- Hole punch, optional
Step-by-step
- Make a triangle template about 5 inches wide and 7 inches tall.
- Trace and cut one triangle for each letter in “HAPPY BIRTHDAY.” You will need 13 flags.
- Leave about 4 inches of blank space at both ends of your string for hanging.
- Write one letter in the center of each flag. Use one simple, bold style rather than mixing fonts.
- If you prefer a softer look, cut letters from a contrasting paper and glue them onto the flags.
- Punch two holes at the top of each flag, or fold the top edge over the string and tape it in place.
- Leave a small space between flags so the words are easy to read.
- Hang “HAPPY” and “BIRTHDAY” on two separate lines for a balanced display.
For a reusable fabric version, make double-sided flags and stitch or glue letters onto the front. Fabric bunting tutorials often use a paper template and leave space between flags before attaching them to tape or binding. This reusable fabric-bunting guide is useful inspiration if you want to make one that can return every year.
Project Five: Style a Simple Cake Table
The cake table does not need many decorations. It needs one clear focal point.
Start with a plain tablecloth, sheet, or piece of fabric. Add the large birthday number, the cake, and one small personal element: a framed photo, a favorite toy, flowers in a jar, or a bowl of fruit in party colors.
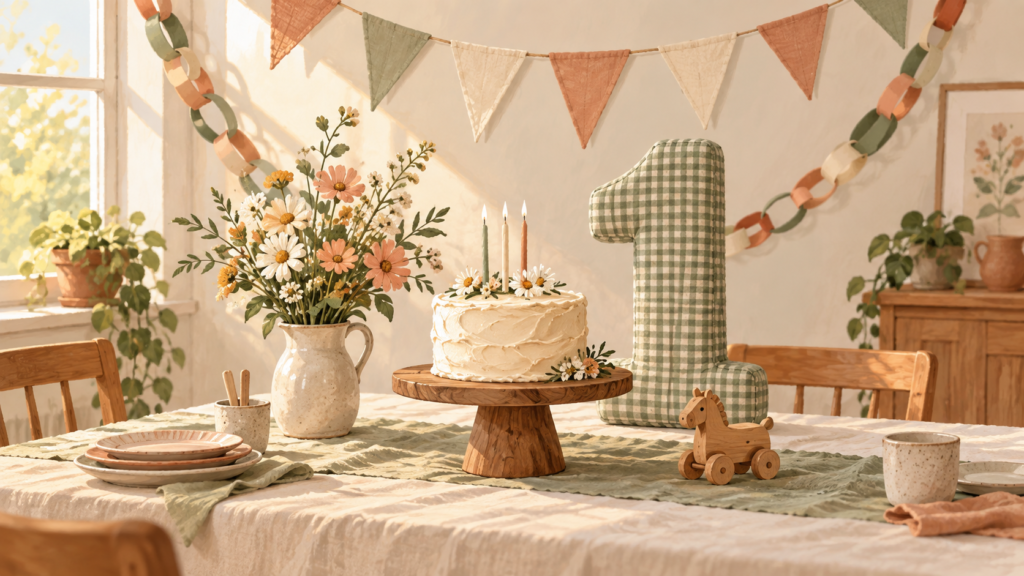
Use height to make the table feel considered:
- Put the cake on a stand, a stack of sturdy books covered with fabric, or an upside-down bowl beneath a plate.
- Place the birthday number slightly behind and to one side of the cake.
- Keep the banner high enough that it shows in photos.
- Use the paper chains or balloons behind the table, not all around it.
Then stop.
The empty space is part of the decoration. It lets the cake, the child, and the people in the room become the focus.
A Simple Setup Timeline
Two or three days before
- Choose your colors
- Cut paper strips and bunting flags
- Make the fabric-covered birthday number
- Gather balloons, ribbon, and adhesive
The night before
- Assemble paper chains
- Finish the banner
- Set up the cake-table backdrop
- Put all balloons and streamers in one place
On the party day
- Inflate balloons shortly before guests arrive
- Attach balloons and streamers
- Place the cake table together last
- Take a few photographs before the room fills up
The Part Children Remember
Children will probably not remember whether every streamer matched.
They may remember that you made a birthday sign with them, that their favorite color was everywhere, that there were balloons on the ceiling when they woke up, or that their age was displayed in a large number just for them.
A DIY party works best when it feels personal, not perfect.
Choose a few materials, repeat your colors, make one area beautiful, and leave enough time to enjoy the celebration once it begins.